
GPS trails are a great addition to your Premium topo. Not only are trails a part of the quality factor evaluation, but they also reassure climbers that they won't loose valuable climbing time looking for the right way on the approach.
Another advantage of GPS trails is to help all climbers use the same paths between boulders or sectors, decreasing the impact on nature and access issues.
To add GPS trails to your Premium topo, follow the steps below:
STEP 1: Record the tracks using your smartphone or watch
There are numerous apps that allow you to record GPS tracks. What you are looking for is an app that allows you to export .gpx files.
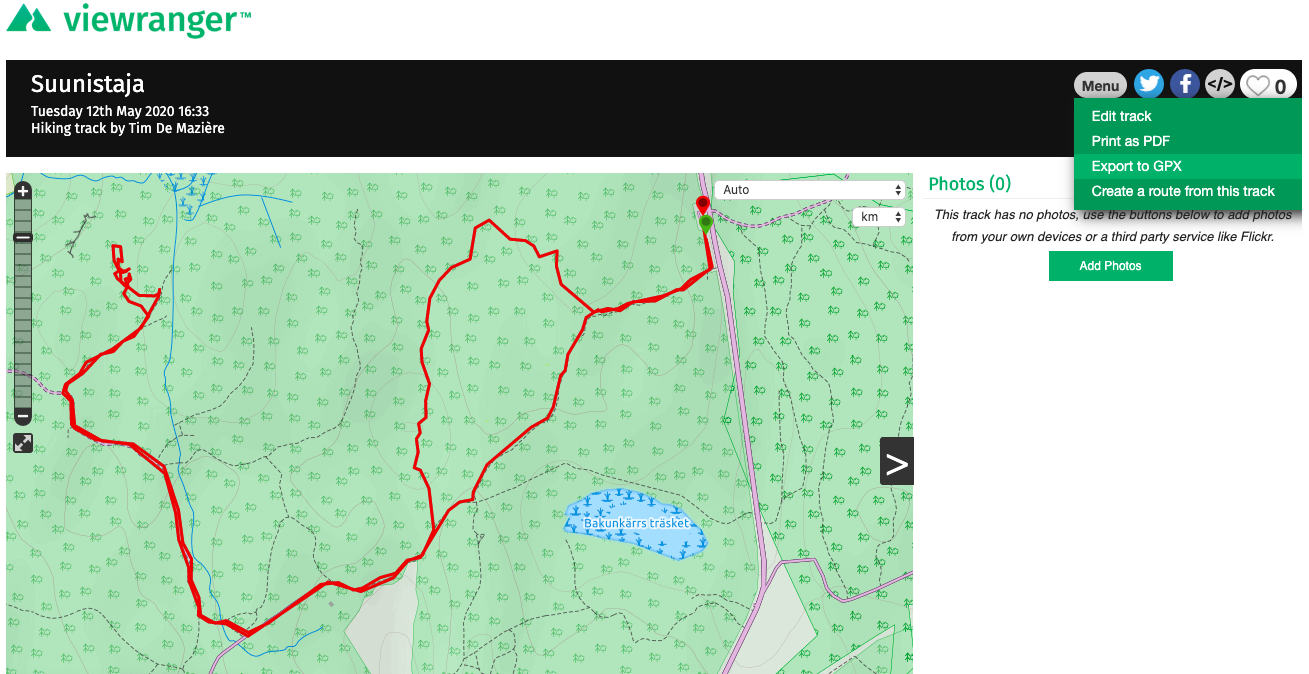
There are many options available but personally, we like ViewRanger because it works well on Android and iOS, and has a web interface too, allowing for easy transfers.
STEP 2: Download your track to your computer
Once you have recorded your track, you want to download the .gpx file to your computer. After that, clean the file from spikes like where you took wrong turns yourself, etc.
STEP 3: Clean the track
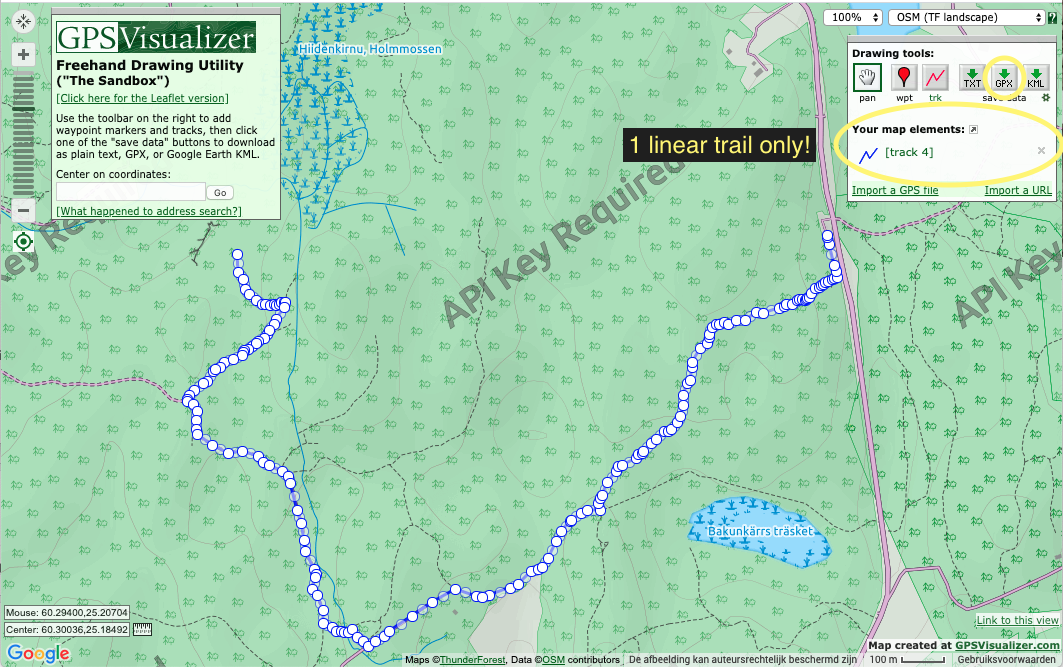
In this example, we kept the GPS recording on the way there and back, but we also took a detour to scout something unrelated. When we add it to 27 Crags, we want 1 clean line only to provide the best accuracy.
To achieve this, upload your track to GPSVisualiser.
- click "Import a GPS file" in the top right
- click "Choose files"
- click "IMPORT"
In the top right you can choose which background map to display. The closest match to the 27 Crags app is "OSM (TF landscape)"
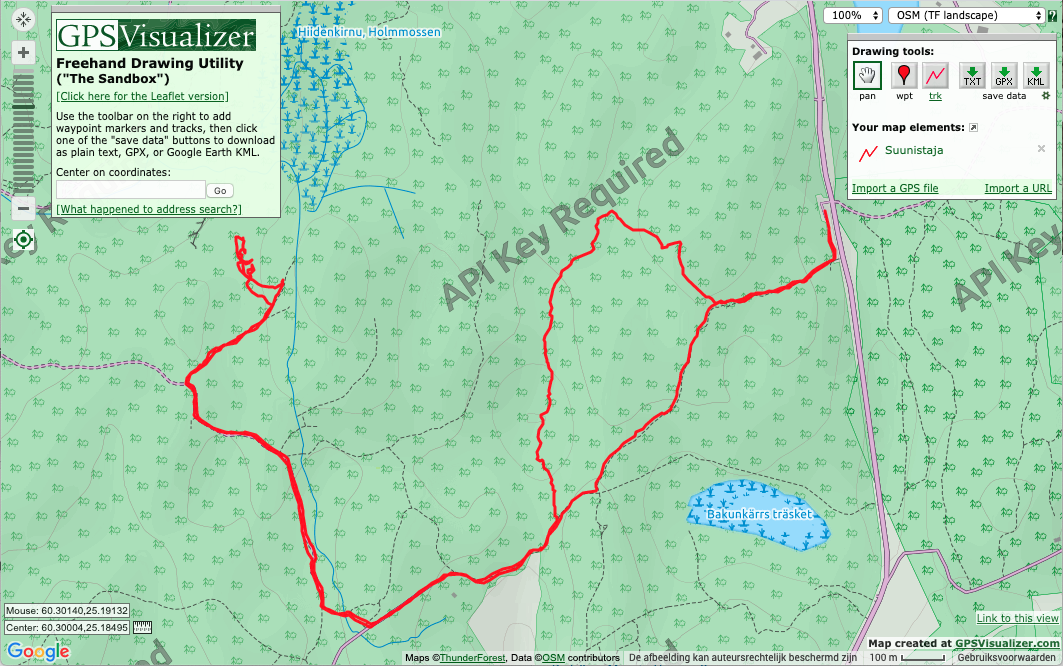
Next, choose to either "clean" the track by removing measuring points, or to draw a new one. In most cases, drawing a new trail is the best choice.
To draw a new trail, click

Trace your trail. If there are already paths on the OSM map, they will show in 27 Crags' apps too, so trace them with some care to avoid messy double paths.
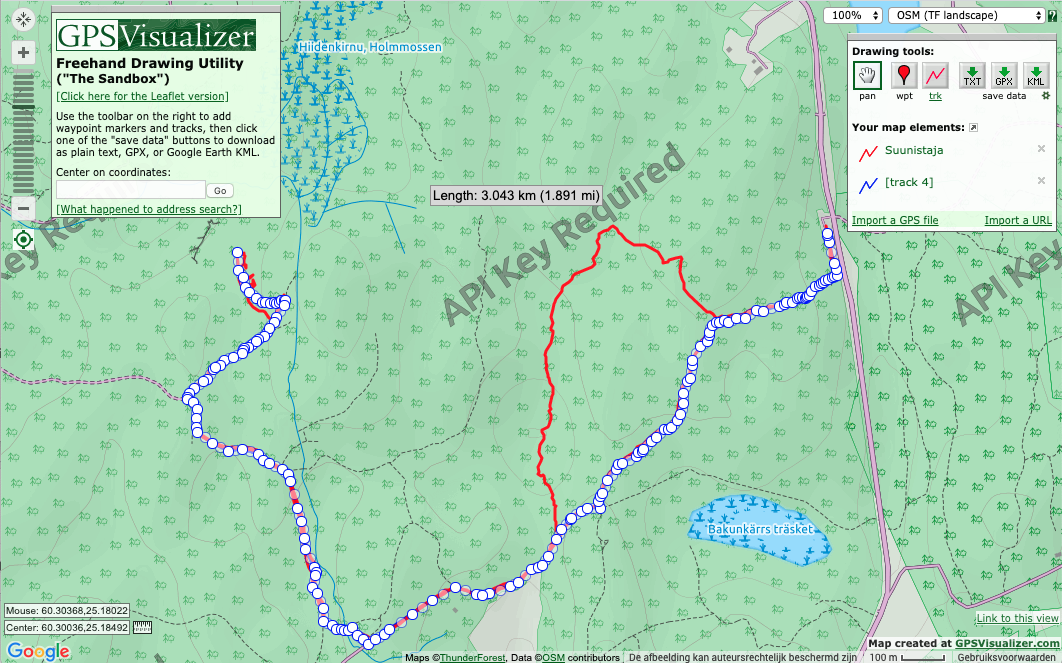
Delete the original trail and download your GPX file. Make sure you only have 1 linear trail on the map when downloading the GPX.
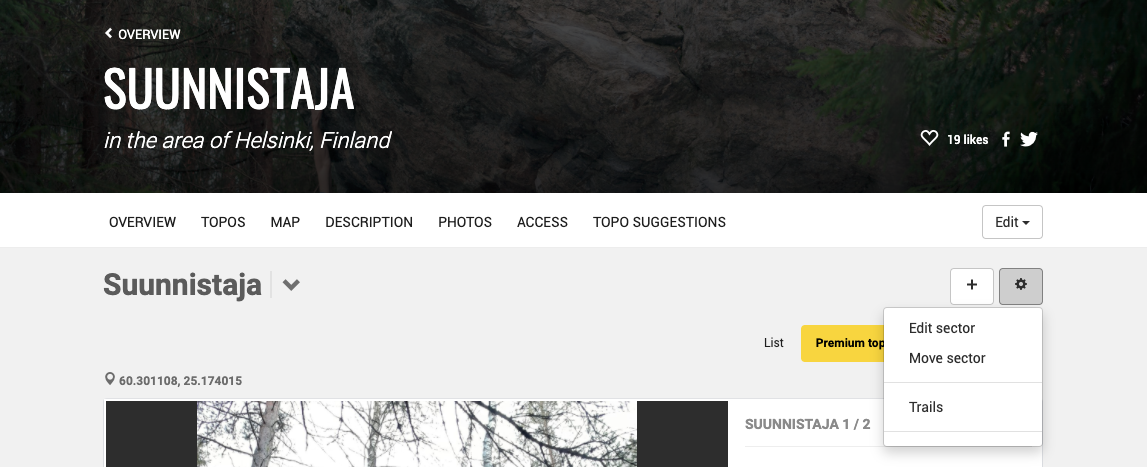
STEP 4: Upload the track to your crag in 27 Crags
- Go to your crag's topos
- Click setting (⚙️ )
- Click Trail
- Upload your file, name the Trail, choose a color
- Tick the box "visible by default on mobile apps"
- Click Save
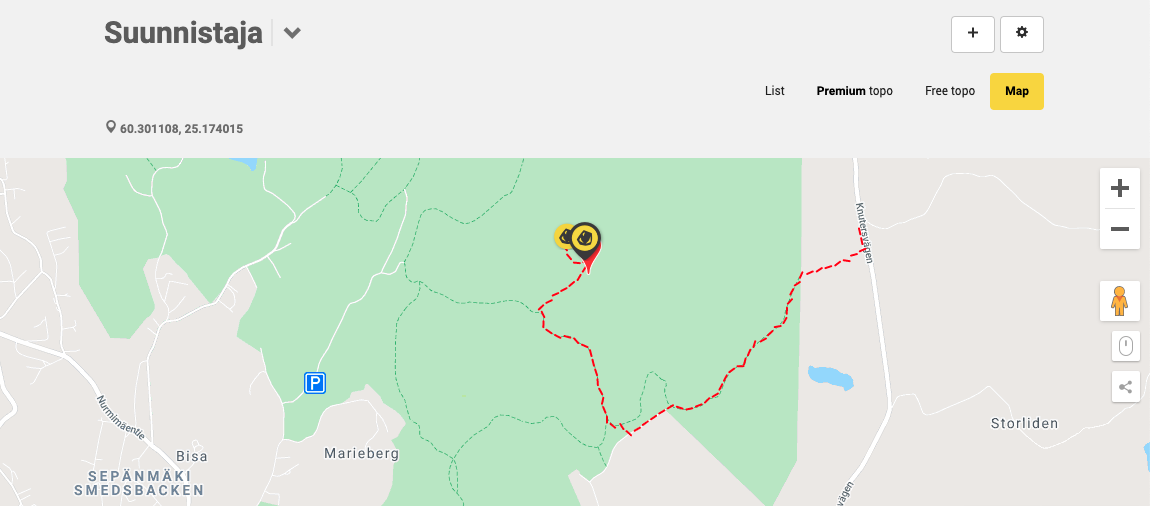
If the trail is not visible yet, refresh the page.
Cross-check in the app. You may have to renew the crag in your app by swiping down on the crag's overview page.
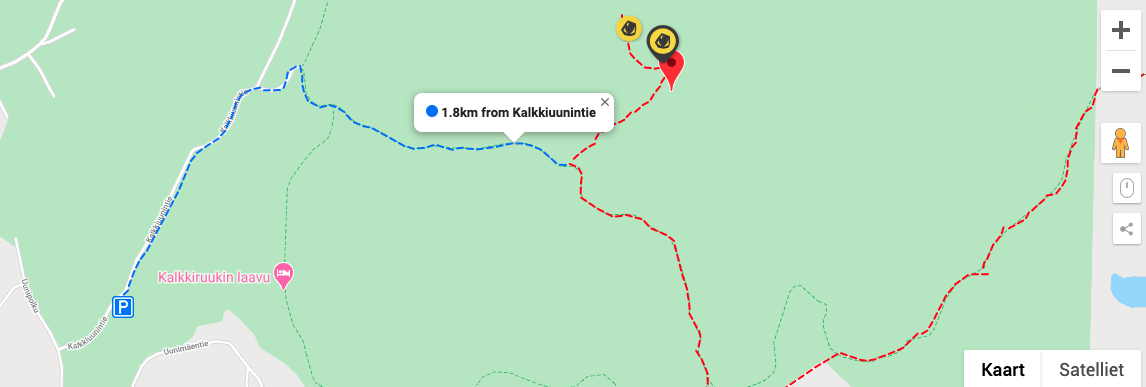
STEP 5: Add more trails
You can repeat all steps from above to add more branches such as approaches from other parkings or to other sectors.
Please avoid overlapping sections if adding multiple trails.
If you have any other questions about topo making, check out the other FAQ's or feel free to get in touch with us.